Backend Authentication
If you have a skill that requires authentication with an identity provider, you can set up an authentication service to enable interaction between Digital Assistant and that identity provider.
For example, you might need to set up an authentication service if you're building a skill for a Microsoft Teams channel, a skill that accesses a Google or Outlook calendar, or a skill that's invoked by an application-initiated conversation that uses an authenticated user ID to identify the user.
You also need to set up an authentication service if your skill uses a
System.OAuth2Client, System.OAuth2AccountLink, or
System.OAuth2ResetTokens built-in component.
If you have a Digital Assistant instance that is paired with a subscription to a Fusion-based Oracle Cloud Applications service, such as Oracle Sales Automation or Oracle Fusion Cloud Human Capital Management, then you don't have to do anything to configure backend authentication for the provided skills. This has been taken care of for you.
Built-In Security Components
Oracle Digital Assistant provides the following security components:
-
OAuth 2.0 Client: Obtains an OAuth2 access token of grant type Client Credentials that a custom component can use to access client resources that are secured by Oracle Identity Cloud Service (IDCS) or Oracle Access Manager (OAM).
(If your dialog flow is developed in YAML mode, use
System.OAuth2Client.)Before you use this component in a skill, register an application as described in Identity Provider Registration, and then ask your administrator to add a service for the client as described in Authentication Services. If you have a Digital Assistant instance that is paired with a subscription to a Fusion-based Oracle Cloud Applications service, such as Oracle Sales Cloud or Oracle Human Capital Management Cloud, then your IDCS instance already has a registered application and an authentication service has already been created.
-
OAuth 2.0 Account Link: Obtains an OAuth2 access token of grant type Authorization Code that a custom component can use to access resources that are secured by one of these identity providers:
-
Oracle Identity Cloud Service (IDCS)
-
Oracle Access Manager (OAM)
-
Microsoft identity platform
-
Google Identity Platform
(If your dialog flow is developed in YAML mode, use
System.OAuth2AccountLink.)Another use for this component is to authenticate users for application-enabled conversations that identify mobile users by their user names, as described in Create a Channel for the External App.
Before you use this component in a skill, register an application as described in Identity Provider Registration, and then ask your administrator to add a service for the client as described in Authentication Services. If you have a Digital Assistant instance that is paired with a subscription to a Fusion-based Oracle Cloud Applications service, such as Oracle Sales Cloud or Oracle Human Capital Management Cloud, then your IDCS instance already has a registered application and an authentication service has already been created.
-
-
Reset OAuth 2.0 tokens: Revokes all the logged-in user's refresh and access tokens from a specified authentication service. This is for dialog flows that use the
System.OAuth2AccountLinkcomponent.(If your dialog flow is developed in YAML mode, use
System.OAuth2ResetTokens.)Note that you can't use this component with the Microsoft identity platform because it doesn't support the revoking of access tokens through REST calls, only through the command line interface.
-
OAuth Account Link: Obtains the authorization code for identity providers that support the OAuth2 protocol. The custom component must exchange this code for an access token. This component doesn't use an authentication service.
(If your dialog flow is developed in YAML mode, use
System.OAuthAccountLink.)
Identity Provider Registration
An administrator must register an application (also referred to as an OAuth client) with the identity provider (IDP) before you can use OAuth2Client, OAuth2AccountLink, or OAuthAccountLink component in a skill.
Register an Application with IDCS or OAM
Before you can use an OAuth2Client, OAuth2AccountLink, or OAuthAccountLink component in a skill, an administrator must register a confidential application (also referred to as an OAuth client) with IDCS or OAM.
If you have a Digital Assistant instance that is paired with a subscription to a Fusion-based Oracle Cloud Applications service, such as Oracle Sales Cloud or Oracle Human Capital Management Cloud, then your IDCS instance already has a registered application named IDCS_OAuthForFA.
To learn how to register an application with IDCS, see Add a Confidential Application in Administering Oracle Identity Cloud Service. Information about registering an application with OAM can be found at Configuring OAuth Services in Administering Oracle Access Management.
When you register an application (client) with IDCS or OAM, you'll need to provide this information:
-
Allowed Grant Types: The application must use either the Authorization Code grant type or the Client Credentials grant type.
-
Scopes or Roles: Include the resources that your custom components need to access. If you include the refresh token grant type, then you also need to add the corresponding scope, which is
offline_accessfor IDCS. -
Redirect or Callback URL: You'll need to provide the URL that the IDP uses to send back the authorization code. Some identity providers refer to this as the redirect URL or the callback URI. To figure out what to use for the redirect URL, go to the Channels page and open any Facebook or Webhook channel (if you don't have any, create a fictitious one). You use the domain and port from the channel's Webhook URL (e.g.,
https://<domain>:<port>/connectors/v2/tenants/<tenantId>/listeners/facebook/channels/<channelId>) to create the redirect URL, which must be in the formathttps://<domain>:<port>/connectors/v2/callback. For examplehttps://example.com:443/connectors/v2/callback.If your instance is provisioned on Oracle Cloud Platform (as all version 19.4.1 instances are), use
v1instead ofv2.
If you are using OAuth2Client or OAuth2AccountLink for authenticating with the IDP, then, after you create the application (OAuth client), note the client credentials, IDP token, and authorization URL. You'll need this information when you create an authentication service as described in Authentication Services.
Register an Application with Microsoft Identity Platform
To register an application with Microsoft identity platform, follow Microsoft's instructions at Quickstart: Register an application with the Microsoft identity platform.
Set the app type to Web.
You'll need to provide the URL that the platform uses to send back the authorization code. To figure out what to use for the URL, go to the Digital Assistant's Channels page and open any Facebook or Webhook channel (if you don't have any, create a fictitious one). You use the domain and port from the channel's Webhook URL (e.g., https://<domain>:<port>/connectors/v2/tenants/<tenantId>/listeners/facebook/channels/<channelId>) to create the redirect URL, which must be in the format https://<domain>:<port>/connectors/v2/callback. For example https://example.com:443/connectors/v2/callback.
After you register the application, you need to create a client secret as described in the Microsoft topic Create a new application secret. You'll use this secret when you create an authentication service for the application.
Register an Application with Google OAuth2 Authorization
To register an application with Google OAuth2, you create a project and enable the necessary APIs as shown in the Google topic Enable APIs for your project. If you plan to use the calendar components, ensure that you enable both the Google Calendar API and the CalDAV API.
Next, get the application's client ID and secret as described in the Google topic Create authorization credentials.
On the OAuth consent screen, specify the scopes that your app will need permission to access. See the Google topic Identify access scopes for more information.
Authentication Services
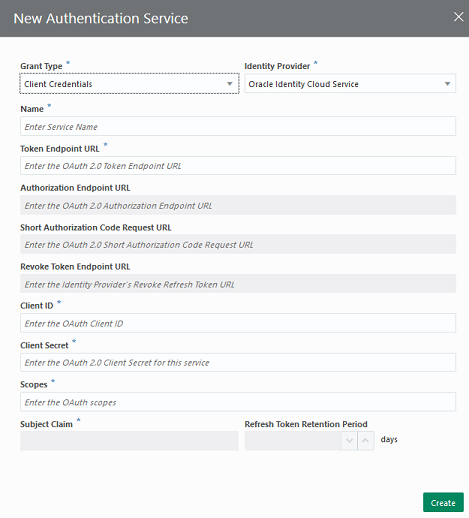
To use the System.OAuth2Client and System.OAuth2AccountLink security components, your administrator must first add a service for the IDP on the Authentication Services page. You can create services for Authorization Code and Client Credential grant types. Authentication Services supports IDCS and OAM R2PS3 identity providers.
If you have a Digital Assistant instance that is paired with a subscription to a Fusion-based Oracle Cloud Applications service, such as Oracle Sales Cloud or Oracle Human Capital Management Cloud, then an authentication service has already been created for the IDCS instance that's associated with your Digital Assistant instance.
Before you create a service, you'll need to ask your IDP administrator to give you the information that you need to add a service.
Add an Authorization Code Service
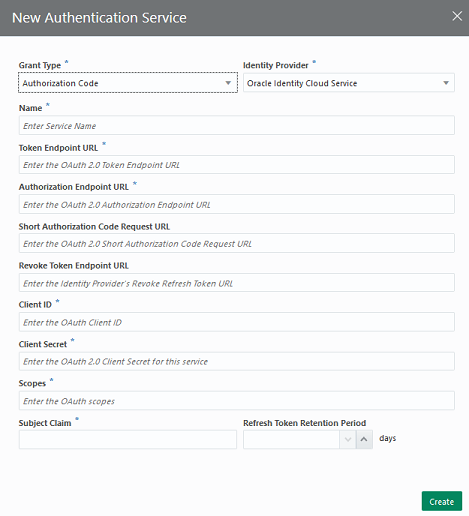
Here's how to create an authentication service for grant type Authorization Code for IDCS, OAM, Microsoft Identity Platform, and Google Identity Platform. This grant type authenticates on user name and password.
Tip:
For IDCS, when a user signs in through a OAuth 2 Account link component (Visual Flow Designer) or aSystem.OAuth2AccountLink component (YAML mode), you can automatically
store the IDCS user's profile information for the duration of a session. See Store IDCS User Profile for the Duration of the Session.
User Identity in Digital Assistant
In Oracle Digital Assistant, you have two main options for managing the identities of users of a given skill:
- Let Digital Assistant assemble a temporary and provisional user profile that is based on the user's channel and whatever user details, if any, are provided by that channel's provider. In such cases, a person who accesses the same skill through different channels would have different profiles for each channel. Details of this profile are stored for 14 days. This is the default behavior.
- Create a unified user identity for each user that is recognized across multiple channels and can be persisted for a longer (or shorter) period of time. In this mode, you can give users the options to consent to or opt out of the linking of their identity details to and storing them with the unified user identity. This approach is available for the Twilio, Slack, and MS Teams channels.
Associating with a unified user also helps with push notifications. It enables the notification service to determine which of the user's channels is viable to receive a notification and hence forward the message to that channel.
Configuring Unified User Identity
You can configure skills for unified user identies with the following general steps:
- Enable channel account linking in the Digital Assistant instance.
- Add an authorization code service in your Digital Assistant instance.
- In the skill's dialog flow, add a OAuth 2.0 Account Link component (for Visual dialog mode) or System.OAuth2AccountLink (for YAML mode).
- In the component, configure the handling of user consent to storing the unified user identity data.
The unified user ID for a given user is set the first time the user accesses the digital assistant and authenticates with a Authorize using OAuth 2.0 component. That is, the initial authenticated identity becomes the "point of truth". All the channel account IDs for the same OAuth 2.0 authenticated user are associated with the unified user ID.
Enable Channel Account Linking
You can enable channel account linking to enable user identities to be recognized across multiple channels of a skill. For example, if a user starts a conversation in one channel and is waiting for a response, they could also receive a notification of that response in the other channel.
To enable channel linking:
- Click
 to open the side menu and select Settings > Unified Identity
Services.
- Set the Channel Account Linking switch to On.
Previous to the 22.12 release, it was possible to enable channel account linking in individual skills by including an OAuth 2.0 Account Link component in the skill and setting its
associateWithUnifiedUser property to true. From
22.12 onwards, this property is deprecated and has no effect, even if it remains in a
component's YAML.
End User Privacy: User Consent Options
When you have activated channel account linking, you can configure how to
handle user consent for each skill individually, using the
requiresAssociationConsent property in the skill's OAuth 2.0
Account Link component. Here are the options:
Yes: Presents the user with the following consent choices for association of the channel account data with a unified user ID:- Associate Account. Confirms the user has approved the linking of the current channel identity with the centralized unified user ID.
- Never Link This Account. Indicates that this specific channel account should not be associated with the unified user ID. The user is not subsequently asked whether to link this account going forward. (though the user can later reverse that decision).
- Not At This Time. Does not link the accounts for the current session, but does not prevent the user from being asked for approval in subsequent sessions. The consent prompt is temporarily suppressed after the user selects this option but may reappear when the user authenticates again more than 24 hours later.
No. The user channel account is automatically linked to the unified user ID without the user being prompted for consent.Notify. The user channel account is automatically linked to the unified user ID, and the user is notified of that fact.
The default value of the property is Yes.
Customize the User Consent Prompts and Messages
There is a set of a prompts and messages that are displayed in the conversation when a user is notified that their channel account identity information is being linked with a unified user identity or if they are given consent options. You can adjust the phrasing of these prompts in messages in the skill's resource bundle.
To access these particular prompts and messages in the resource bundle:
- In the skill, click
 to open the Resources Bundle.
- Select the Configuration tab.
- In the Filter field, enter
OAuthAccount2Link - consentto display the consent-related bundle entries.
Retention of Unified User Data
The length of time that unified user identity data is stored is set at the instance level.
To configure the amount of time that such data is stored:
- Click
 to open the side menu and select Settings > Unified Identity
Services.
- Set the Delete user's channel account data after the
specified retention period switch to On.
If it is not switched on, the user's channel account data will be retained indefinitely.
- In the Retention period for channel account user data (in
days), enter the number of days that you want the data to be
stored.
The minimum of 7 and the maximum is 1100.
Note
Jobs to purge the data run only once every 24 to 48 hours. So, depending on the time of the job, the data might be retained for up to 48 hours longer than the retention period that you designate.
The Delete user's channel account data after the specified retention period only affects channel-related data that is stored as part of a unified user identity. When channel account linking has not been enabled, the user’s profile data from the channel will be retained for a 14 days.
For channels where channel linking is not supported, the 14-day period also applies, even if channel account linking has been globally enabled.


